Making a 6-Stranded Challah Braid
The name of the game here is “over two, under one, over two.” Carry the right-most rope over the two ropes beside it, slip it under the middle rope, and then carry it over the last two ropes. Lay the rope down parallel to the other ropes; it is now the furthest-left strand. Repeat this pattern until you reach the end of the loaf. Try to make your braid as tight as possible. Your braid will start listing to the left as you go; it’s ok to lift it up and recenter the loaf if you need to. Once you reach the end, squeeze the ends of the ropes together and tuck them under the loaf.
At this point, your loaf is fairly long and skinny. If you’d like to make a celebration ring, stretch the loaf a little longer and pull the ends toward each other to create a circle. You can either squeeze the ends together, or if you’re feeling adventurous, braid them into a continuous circle.
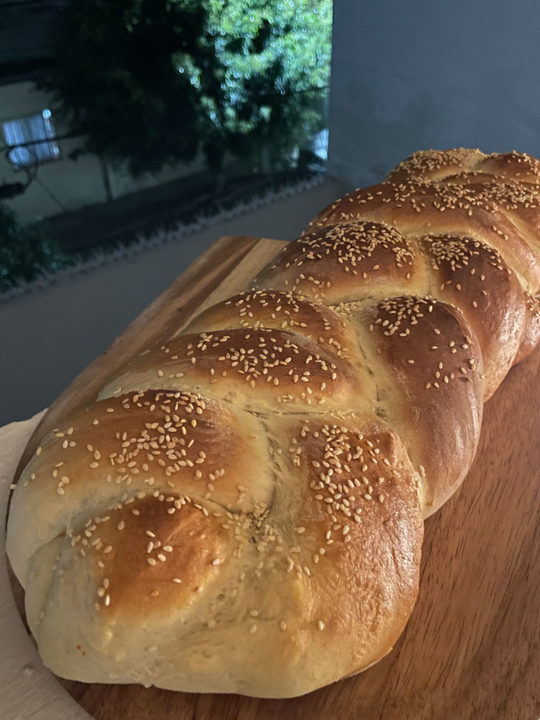
If you’re making a regular loaf (as pictured), you need to “plump” it a little to tighten the ropes into more of a loaf shape. Place your left palm at the end of the braid and your right palm at the top, and gently push the two ends toward each other, just like plumping a pillow in slow motion. Then slip your fingers under the dough along either side and gently lift the dough while cupping it downwards. (This isn’t a vital step, so don’t worry if you’re not sure you did it correctly.)
Challah Bread
Description
Making a 6-Stranded Challah Braid
The name of the game here is "over two, under one, over two." Carry the right-most rope over the two ropes beside it, slip it under the middle rope, and then carry it over the last two ropes. Lay the rope down parallel to the other ropes; it is now the furthest-left strand. Repeat this pattern until you reach the end of the loaf. Try to make your braid as tight as possible. Your braid will start listing to the left as you go; it's ok to lift it up and recenter the loaf if you need to. Once you reach the end, squeeze the ends of the ropes together and tuck them under the loaf. At this point, your loaf is fairly long and skinny. If you'd like to make a celebration ring, stretch the loaf a little longer and pull the ends toward each other to create a circle. You can either squeeze the ends together, or if you're feeling adventurous, braid them into a continuous circle. If you're making a regular loaf (as pictured), you need to "plump" it a little to tighten the ropes into more of a loaf shape. Place your left palm at the end of the braid and your right palm at the top, and gently push the two ends toward each other, just like plumping a pillow in slow motion. Then slip your fingers under the dough along either side and gently lift the dough while cupping it downwards. (This isn't a vital step, so don't worry if you're not sure you did it correctly.)- 250 g lukewarm water
- 15 g yeast
- 500 g flour
- 50 sugar
- 2 teaspoons salt
- 2 eggs
- 1 egg yolk (reserve the white for the egg wash)
- 50 g olive oil